Replace Headlights and Taillights Assembly with After Market Lights
SHARE
Upgrading the headlights and taillights on your vehicle can significantly enhance its appearance and improve visibility on the road. Whether you’re looking to add a touch of style or improve the functionality of your car, replacing your stock lights with aftermarket options is a straightforward process that can be accomplished with a few tools and a bit of patience. In this comprehensive guide, we’ll walk you through the step-by-step process of replacing your headlights and taillights with aftermarket lights.
First and foremost, it’s essential to ensure that the aftermarket lights you’ve chosen are compatible with your vehicle’s make, model, and year. This will ensure a seamless installation and proper fit. Once you’ve confirmed the compatibility, gather the necessary tools, which typically include a screwdriver set, pliers, and a socket wrench.
Begin by parking your vehicle on a level surface and engaging the parking brake. This will provide a stable and safe working environment. Next, locate the headlight and taillight assemblies. Depending on your vehicle, the process may vary slightly, but the general steps remain the same.
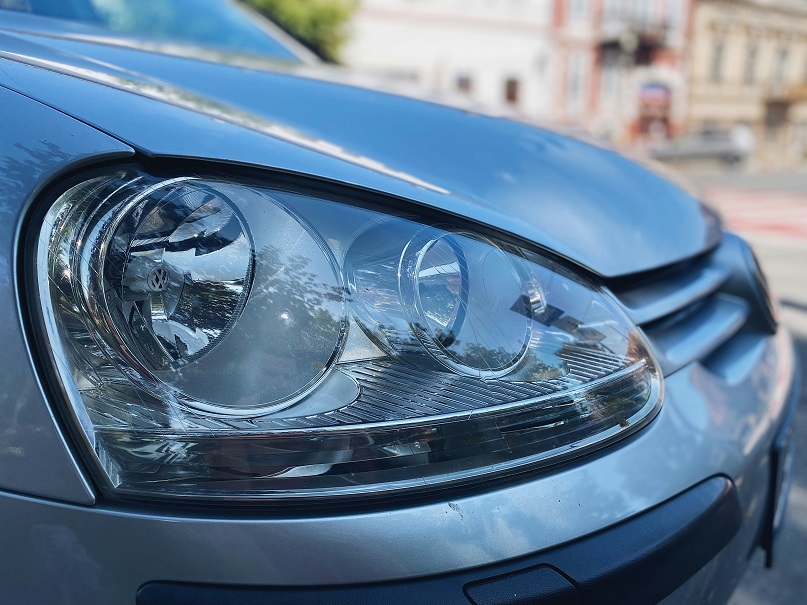
For the headlights, start by disconnecting the electrical connector from the back of the assembly. This will allow you to remove the headlight without any risk of electrical shock. Carefully remove any screws or clips that are holding the headlight in place, and gently pull the assembly out. Be mindful of any wiring or harnesses that may be attached, as you’ll need to disconnect those as well.
With the old headlight removed, it’s time to install the new aftermarket unit. Align the new headlight assembly with the mounting points and secure it in place using the screws or clips you removed earlier. Reconnect the electrical connector, ensuring a secure and proper connection.
Repeat this process for the other headlight, taking care to match the left and right assemblies correctly. Once both headlights are installed, turn on your vehicle’s lights to ensure the new headlights are functioning properly.
Moving on to the taillights, the process is similar. Locate the taillight assemblies, which are typically secured with screws or clips. Disconnect the electrical connector and remove the old taillight. Install the new aftermarket taillight, aligning it with the mounting points and securing it in place. Reconnect the electrical connector and test the new taillights to ensure they are working correctly.
It’s important to note that some aftermarket lights may require additional wiring or modifications to integrate seamlessly with your vehicle’s electrical system. If you’re not comfortable with electrical work, it’s recommended to consult a professional mechanic or refer to the manufacturer’s instructions for guidance.
After completing the installation, take a step back and admire your handiwork. The new aftermarket headlights and taillights should not only enhance the overall appearance of your vehicle but also improve visibility and safety on the road.
Remember to always follow local laws and regulations regarding vehicle modifications, and ensure that your new lights are properly adjusted and aimed to provide optimal illumination.